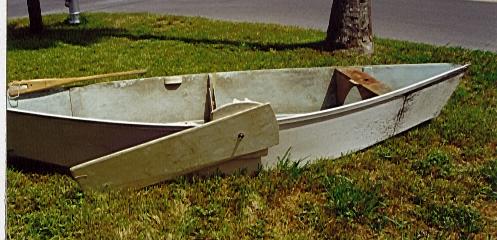
 The side of the boat showing the rudder and leeboard pivoted up.
In this position one could launch off a beach or shallow area, row or pole out to deeper water and
lower (more likely push down) the rudder and leeboard to sail.
The side of the boat showing the rudder and leeboard pivoted up.
In this position one could launch off a beach or shallow area, row or pole out to deeper water and
lower (more likely push down) the rudder and leeboard to sail. The DH Boat is a plywood construction. It was a design project by a friend of mine, to see how big a boat he could build out of 2 sheets of 4 ft. x 8 ft. plywood.
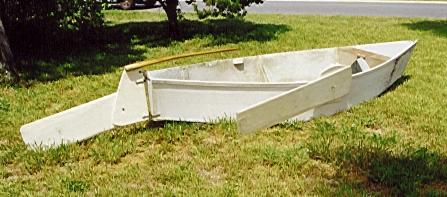
The side of the boat showing the rudder and leeboard pivoted up.
In this position one could launch off a beach or shallow area, row or pole out to deeper water and
lower (more likely push down) the rudder and leeboard to sail.
The blade of the Leeboard is
12 and 1/4 inches wide
and 49 and 1/4 inches long
The hole for pivoting is 40 and 1/4 inches up from the bottom end.
The head of the Leeboard is
14 and 1/4 inches wide
and 15 and 3/4 inches top to bottom.
The hole for pivoting is 7 and 1/4 inches up from the bottom edge.
The cross piece that rests on the gunwale when it is on the boat
is 9 and 5/8 inches up from the bottom edge.
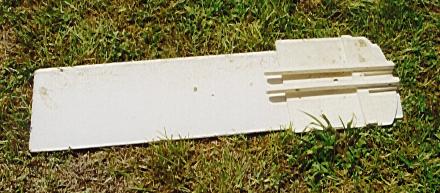
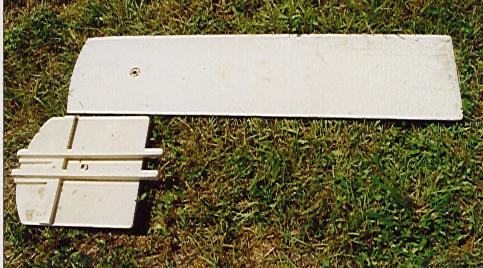 Leeboard - showing the side of the top that goes inside the hull.
In this picture the 2 parts are not bolted together.
Leeboard - showing the side of the top that goes inside the hull.
In this picture the 2 parts are not bolted together.
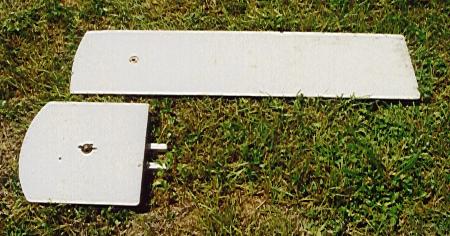 Leeboard - showing the side of the top that goes outside the hull.
In this picture the 2 parts are not bolted together.
Leeboard - showing the side of the top that goes outside the hull.
In this picture the 2 parts are not bolted together.
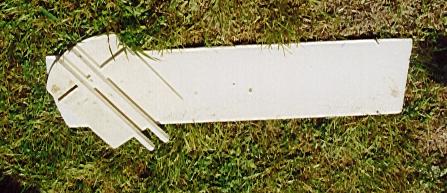 Leeboard bolted together, in swept back position.
The bolt that attaches the 2 parts of the Leeboard together also is the pivot
that allows it to swing up. It is a Carriage Bolt. That is it has a head that
has a 4 sided part under the head that when it is driven in the hole it is to go through
keeps it from turning when a nut is placed on the other end and tightened.
The nut on the other side of this bolt is a wing nut. That makes it easy to
tighten and loosen with the fingers - without need for any tools.
It is important to use a LARGE (thick) bolt - 1/2 inch ( 13 mm ) would be good.
It probably should be 2 inches long. Check the thickness of the 2 pieces that make up
the leeboard and add some for the nut to grab on, and a little more just for safety.
This bolt is a moving bearing surface and larger works better.
It might be good to drill a small hole in one side of the wing nut and tie a bit of
string on it to keep it from being lost if it falls overboard.
A large washer just inside the wing nut will keep the lower part of the leeboard
from getting torn up by the nut when it is tightened.
A brass carriage bolt would probably be best. The prototype boat has one that is
either galvenized or cadmium plated, and is a little rusty. Of course replacing a
rusty carriage bolt every year or 2 is not a huge problem.
Leeboard bolted together, in swept back position.
The bolt that attaches the 2 parts of the Leeboard together also is the pivot
that allows it to swing up. It is a Carriage Bolt. That is it has a head that
has a 4 sided part under the head that when it is driven in the hole it is to go through
keeps it from turning when a nut is placed on the other end and tightened.
The nut on the other side of this bolt is a wing nut. That makes it easy to
tighten and loosen with the fingers - without need for any tools.
It is important to use a LARGE (thick) bolt - 1/2 inch ( 13 mm ) would be good.
It probably should be 2 inches long. Check the thickness of the 2 pieces that make up
the leeboard and add some for the nut to grab on, and a little more just for safety.
This bolt is a moving bearing surface and larger works better.
It might be good to drill a small hole in one side of the wing nut and tie a bit of
string on it to keep it from being lost if it falls overboard.
A large washer just inside the wing nut will keep the lower part of the leeboard
from getting torn up by the nut when it is tightened.
A brass carriage bolt would probably be best. The prototype boat has one that is
either galvenized or cadmium plated, and is a little rusty. Of course replacing a
rusty carriage bolt every year or 2 is not a huge problem.
 Leeboard bolted together, in full down position - normally it is
this position when sailing.
Leeboard bolted together, in full down position - normally it is
this position when sailing.
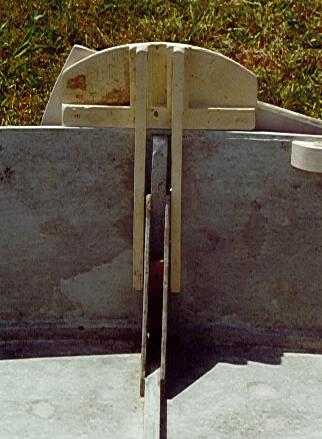 The Leeboard attached to the hull. View from the inside.
Note that the forks that attach the leeboard to the hull straddle the frame.
This is how the leeboard keeps from shifting.
In practice the leeboard is strong enough to survive being left on one side
when sailing on either tack. You do not have to move it when tacking.
It works good enough.
The Leeboard attached to the hull. View from the inside.
Note that the forks that attach the leeboard to the hull straddle the frame.
This is how the leeboard keeps from shifting.
In practice the leeboard is strong enough to survive being left on one side
when sailing on either tack. You do not have to move it when tacking.
It works good enough.
It is important to make the leeboard forks from fairly
strong wood, such as Ash, Oak etc. or make them a little thicker than shown here.
 Looking down from above when Leeboard is attached to the hull.
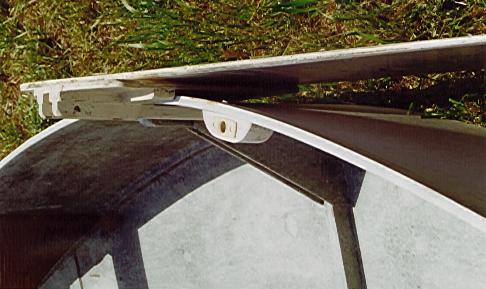
 The Leeboard attached to the side of the hull.
The whole rudder and leeboard assemblies were made out of scrap 1/2 inch thick exterior plywood that was given to us at a house building site from their scrap pile. Some of the dimensions were dictated by the size of the pieces we had. They seem to work, but could probably be modified in size and shape and performance might not suffer.
Click here to return to the Hull Detail pictures (DHBoatP2.htm).
Click here to the Detail pictures - Leeboard - this page - (DHBoatP3.htm).
Click here to the Detail pictures - Rudder - (DHBoatP4.htm).
Click here to the Detail pictures - Oars - (DHBoatP5.htm).
Click here to return to the page with the Diagrams (DHBoat1.htm).
====
Click here to return to the boat building index page.
If you mail me about this page refer to page dhboatP3.htm