~ ~ ~ ~ ~ Simple Oars - detail ~ ~ ~ ~ ~
NOTE - these oar types presume that you already have standard OARLOCKS.
The notches are made to fit into standard oarlocks.
Why make oars by one of the following methods?
-
- They are less expensive than store-bought oars.
- They do not pivot. The blades stay perpendicular to horizontle. Making it easier to row.
- They stay put in the oarlocks, not moving in (together) or out. Making it easier to row.
-
- They do not look pretty.
- They may not be as strong as oars made of Ash wood, but will be plenty strong for ordinary work.
- With these oars you will not be able to row and feather the oars as experts do.
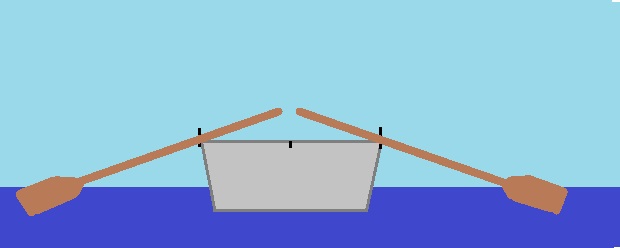
The oar is made of a 2x4 cut as needed and thinned by the blade.
One needs to find a good 2x4 with no knots in the middle part.
It is best to find a light weight 2x4 - whitewood instead of southern yellow pine which although strong is very heavy.
- - - Plan 1 - - -
The rough and more crude method... but works. May need a little tweaking.
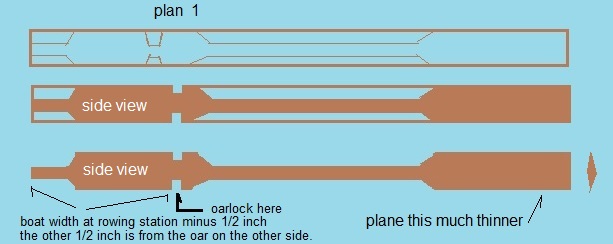
Tweak 1 - Oriented this way at where the oarlock meets the oar it will probably bind
and not work well
It would be best to use the cut off part from thinning the loom to create notch which keeps the oar
from sliding in or out. This is in essence the making that part of the oar as is illustrated in Plan 3.
but the blade of the oar is carved directly from the end of the oar.
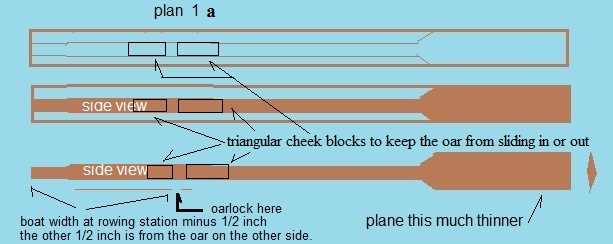
- no - You cut away the excess in the loom (long part of the oar) and
- no - shape where it sits in the oarlock so that it is snug and does not have a tendency to twist.
Do NOT round the oar where it sits in the oarlock.
Measure the distance from the oarlock to he middle of the boat.
Make the length of the oar from the oarlock to the oar grip (handle) in middle of the boat MINUS 1 inch.
You want to leave an inch between the oars then they are all the way in so as to prevent pinching your finger.
Yes, some rowers overlap their oar handles. That is for advanced rowing.
Play it safe make it so you will not pinch your finger or hand.
In that shaping leave the width greater either side of the oarlock so that the oar will not
slide in or out, maintaining a proper distance.
Shape and round the handle the width of an adult hand, plus an inch for a good grip.
Thin down the blade as needed. You may attach plywood to make a larger blade for more bite.
_____________
The thick part near the handle which is left on, where -top view- and -side view- show on the diagram
are left as a counterweight to the loom of the oar, making it easier to row.
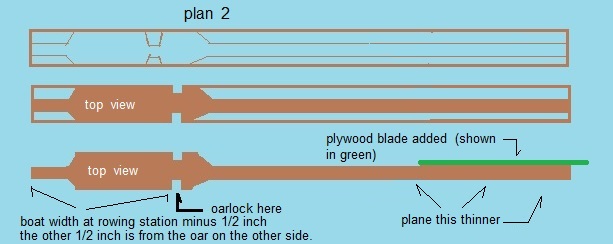
- - - Plan 2 - - -
Involves trimming the 2x4 so it lies flat when used and
Adding the blade of the oar to the tip.
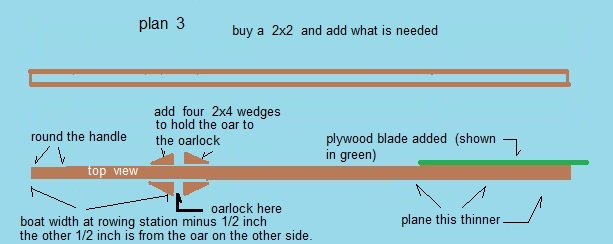
- - - Plan 3 - - -
Buy a clear piece of 2x2 and add what is needed.
- a plywood blade
- four 2x wedges to hold the oar in place to the oarlock
- round the handle for a good comfortable grip
When you are done constructing the oar, sand it smooth and paint it.
Once I painted my store-bought oars so they could easily be indentified as mine
and marked them so I couuld easily use them to determine how deep the water was in shallow areas.
to the Oars index page.
- update - 13 November 2015 - 8 November 2021
to the boatbuilding index page.
Return to the main page.