Saboteer
The Saboteer design is a Glen-L version of the Sabot pram dingywhich has been enlarged from the original Sabot (just uner 8 feet) to 9 feet 9 inches long overall.
----------------------
Having built a model I was ready to build a full-size Saboteer dingy.
I decided to stretch it by adding 3 inches between each frame resulting in a hull 10 ft. 9.5 in.long.
After frames, bow and stern transoms set up and sides attached it is 10 ft 7.5 inches long and 4 ft 7.5 inches maximum beam.
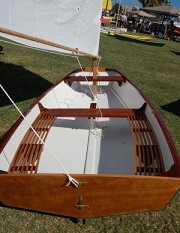
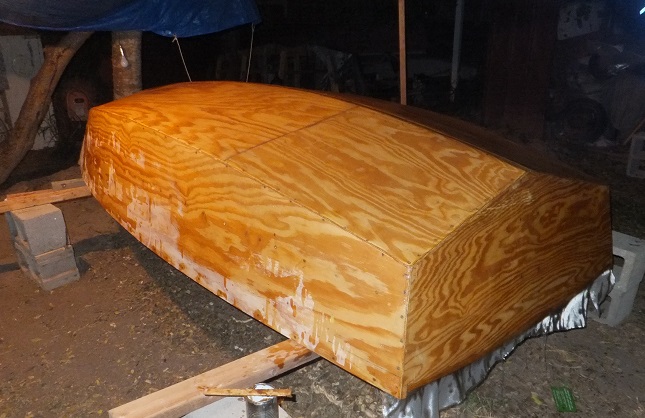
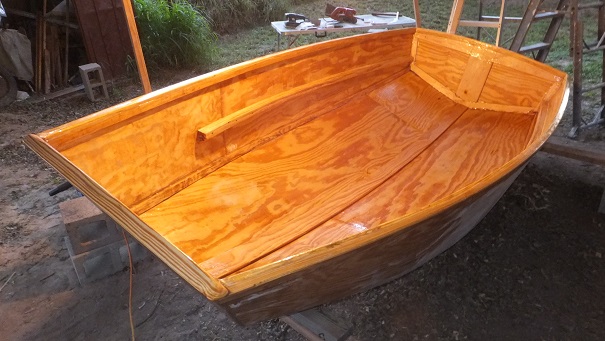
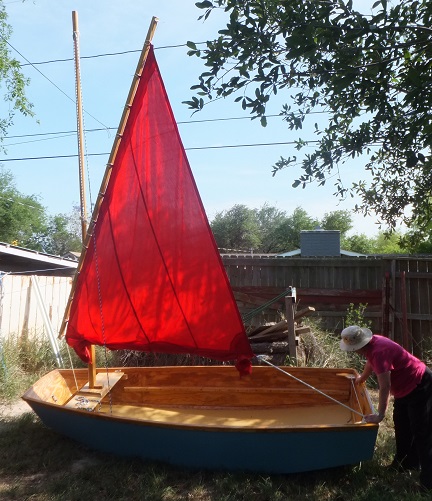
below.. a beautifully executed previously built Saboteer built exactly to plan.
It was exhibited at the 2014 plyWooden Boat Festival in Port Aransas, Texas
~ ~ ~ ~ ~ ~ ~ ~ ~ ~ ~ ~ ~ ~ ~ ~ ~ ~ ~ ~ ~ ~ ~ ~ ~ ~ ~ ~ ~ ~ ~
 -
-

~ ~ ~ ~ ~ ~ ~ ~ ~ ~ ~ ~ ~ ~ ~ ~ ~ ~ ~ ~ ~ ~ ~ ~ ~ ~ ~ ~ ~ ~ ~
Below begins the build of this boat, which I have come to call a Saboteer +
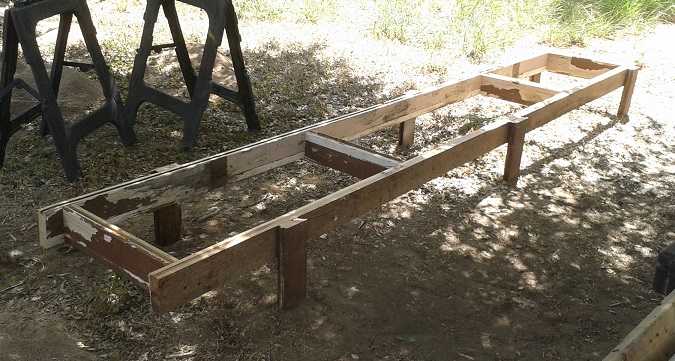
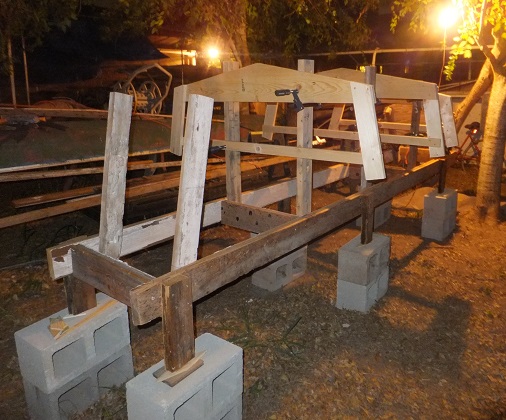
The building base was made from 2x6 lumber scavenged from a house re-build.
The paint on the lumber consisted of more than one layer of latex which was peeling off.
Out of the longer 16 ft. boards I cut out some rotten places and used sound wood. Done 3 Aug 2016

frame tops (actually bottoms) cut out
building frame uprights attached
This is where I added length to the boat by spacing them farther apart than the original plan.
The 3 middle frames cut outside but screwed together in the kitchen where the AirConditioning works
 -
- 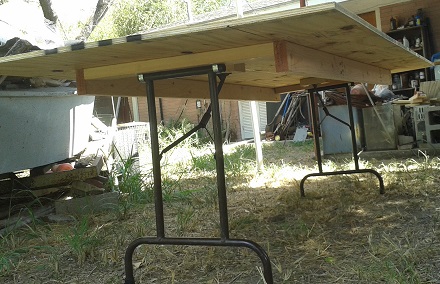
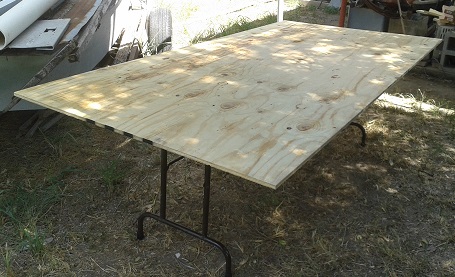
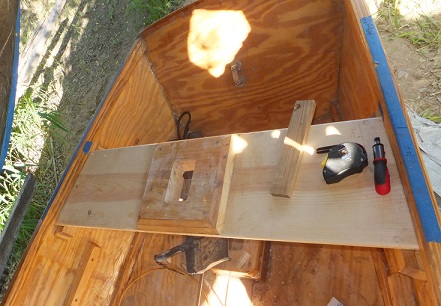
I was given some folding table legs - so got some plywood and 2x4s and made a building table
![]()
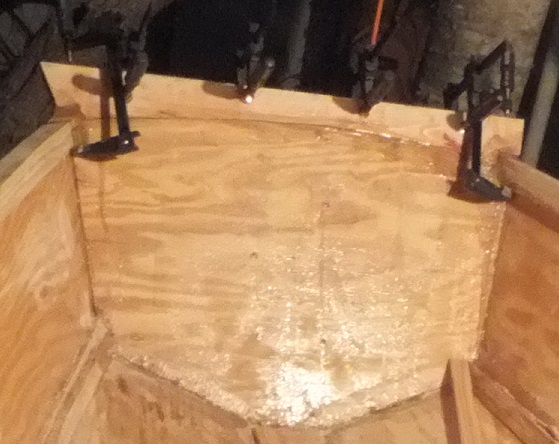
transom frame top measured to plan
![]()
Stern Transom frame glued to transom - Mona
The Bow Transom frame was also glued in the same time.
This done on 9 August, about 7 PM when it began to cool down to the mid 90s deg. F.
after a daily (and record) high of 106 deg. in McAllen.
We use slow hardener with our epoxy work.
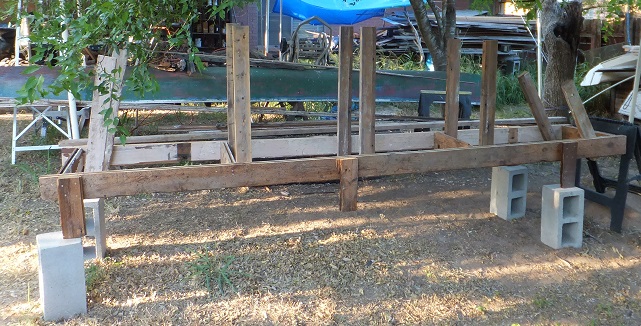
Frames clamped to building frame. Not yet leveled etc.
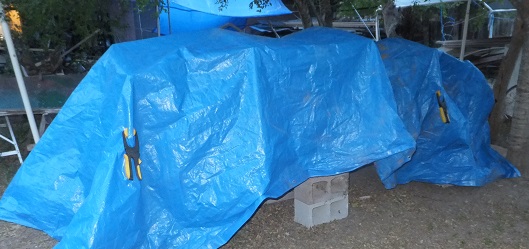
building area covered in case of rain
![]()
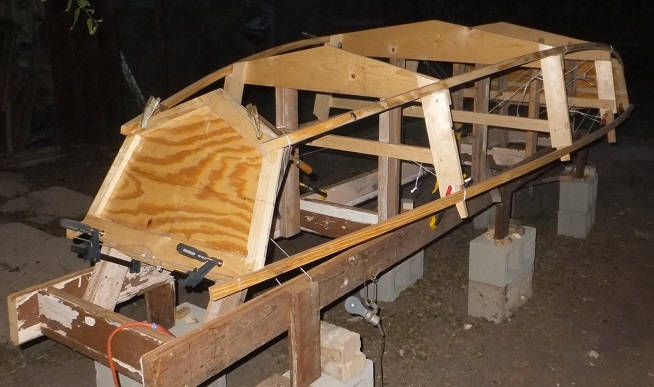
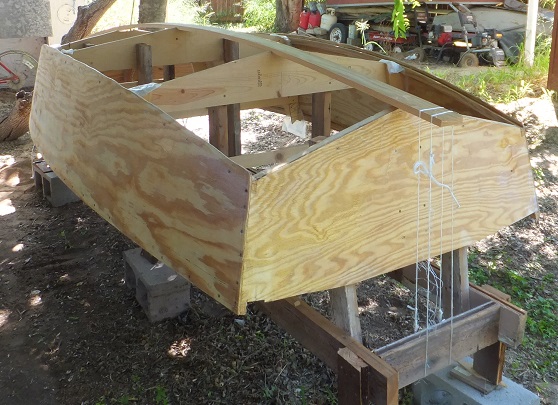
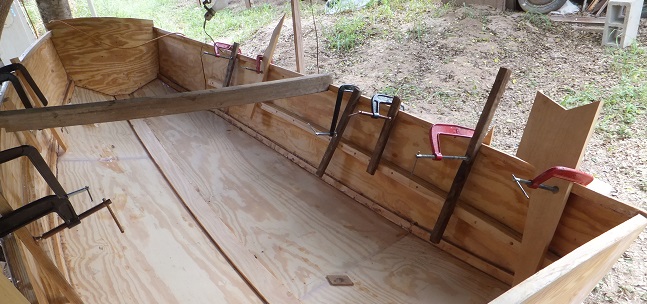
Frames and transoms attached to building frame, all straight and leveled.
This is where I added 3 inches between each of the frames.
from the bow transom to first frame from 30 inches to 33 inches
from first frame to middle frame from 29.5 inches to 32.5 inches
from the middle frame to the aft frame from 29.5 inches to 32.5 inches
and from the aft frame to the rear transom from 28 inches to 31 inches
I did not modify the width of the hull in any way.
18 August 2016
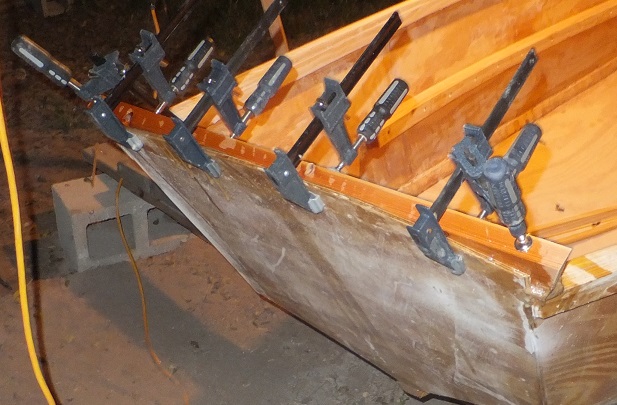
Chines and sheer strakes attached
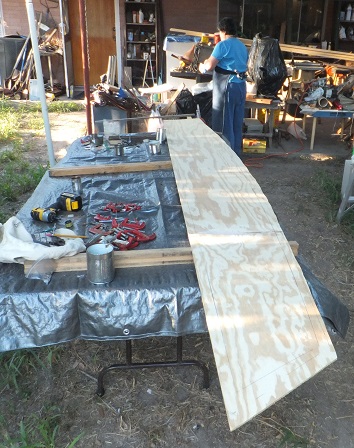
side cut out from scarfed plywood
Sides on - not trimmed
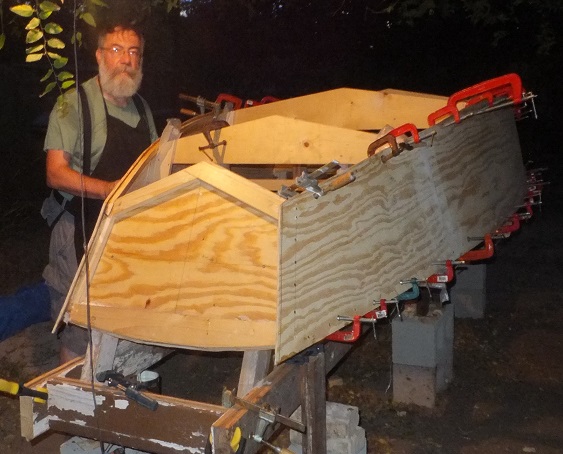
The sides attached, trimmed - A few minutes after this photo taken it sprinkled.
We put on a layer of clear plastic sheeting then the blue tarp as a top layer.
Very shortly after we got the cover secured the rain came down in earnest.
31 August
~ ~ ~ ~ ~ ~ time out for travel etc. ~ ~ ~ ~ ~ ~
Keelson (inner keel) fitted
13 October 2016
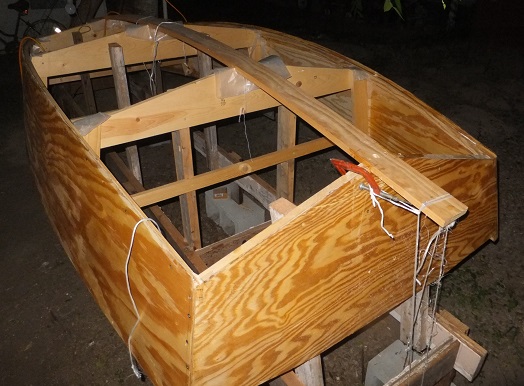
Keelson (inner keel) attached
14 October

Port side bottom on - not yet trimmed.
17 October
Starboard side bottom on - not trimmed
Port side trimmed.
18 October 2016
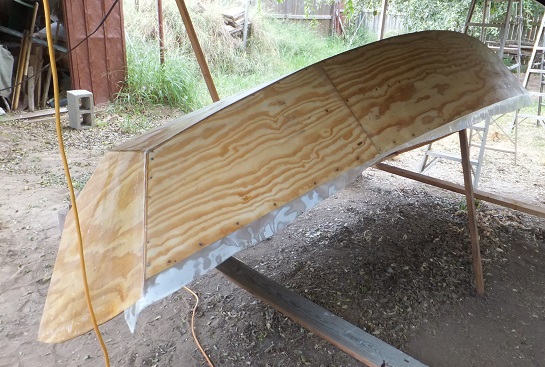
Time for a whiskey plank celebration.
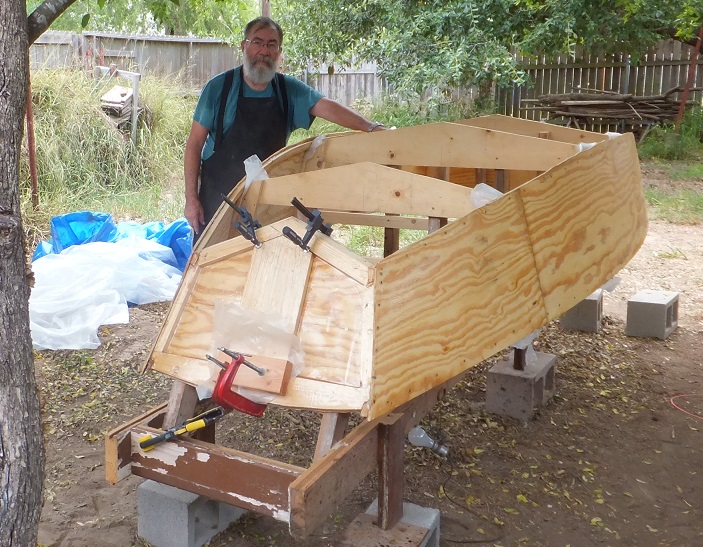
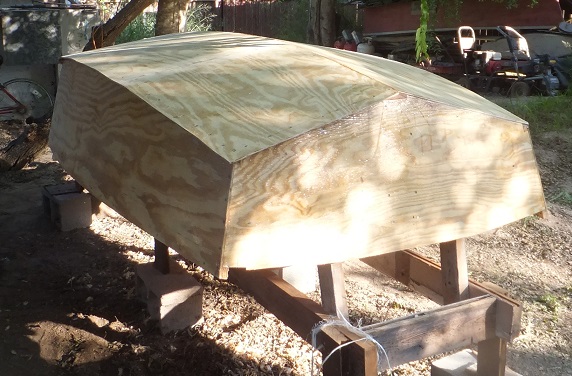
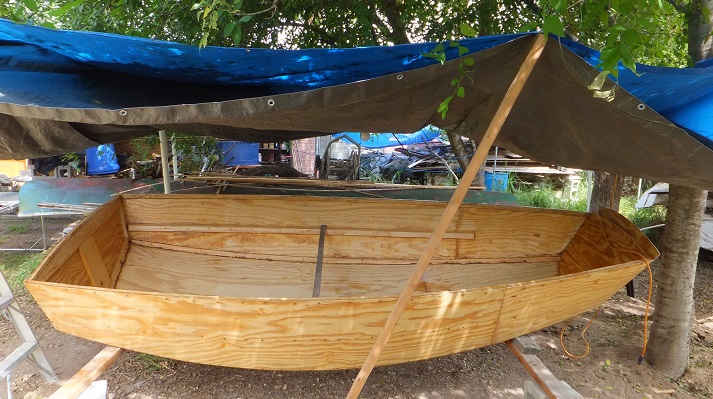
After lifting the hull off the building frame - Delighted that it is light enough for Mona and I can easily lift it. 24 Oct.
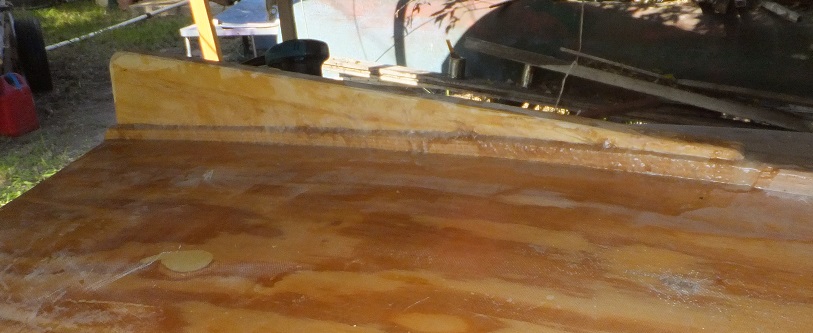
6 oz fiberglass applied to the bottom, forward and aft transoms. Yes, done after sunset. 1 November
3.5 oz fiberglass applied to Starboard side - done about noon - it was 93 degrees out. 2 November

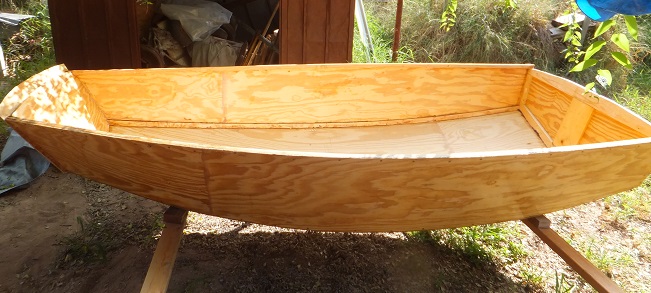
sides and bottom fiber glassed and trimmed - 3 November
 -
- 
External Keel on - 3 November - Evening

Second thwart riser added to the first to make a wider area of contact. - 4 November
Daytime view of the 2nd thwart riser the day after it was attached - clamping scheme visable.
grey stick showing how the thwart riser would work. - 5 November (high temp today 90.7 deg. F)
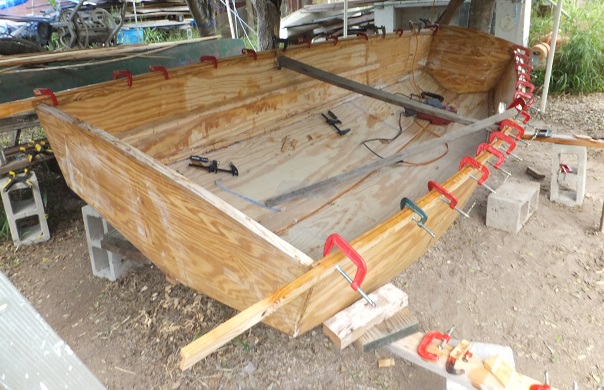
Gunwales glued and clamped. - 6 November (high temp today 87 deg. F)
~ ~ ~

Gunwale cap. seals the top of the gunwale/sheer clamp. - 11 November
The days following 11 Nov. were overcast with frequent light rain and cooler temperatures.
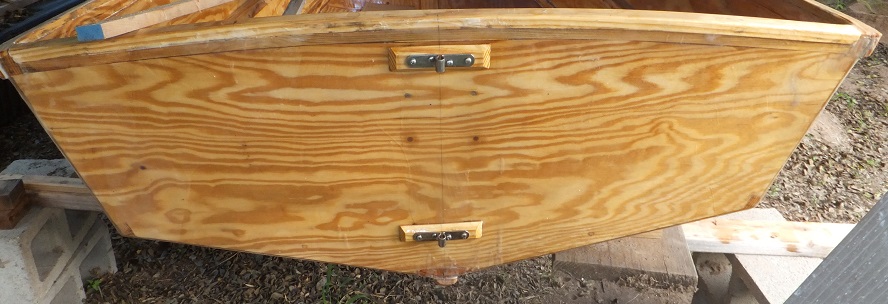
Cut and attched Cap on stern transom finishing that transom. - 14 Nov. 2016
~ ~ ~
Finishing the bow transom top was a complicated build with extra steps.
 -
- 
Bow transom finish piece cut and installed. This leveled up the Bow transom and prepared it for the cap.
15 Nov. 2016

Bow transom CAP was cut and figuring out to clamp it on took some doing. No screws were used.
This was the final piece to finish off the Bow transom and cover the raw edge of the top edge of the plywood. - 16 Nov.
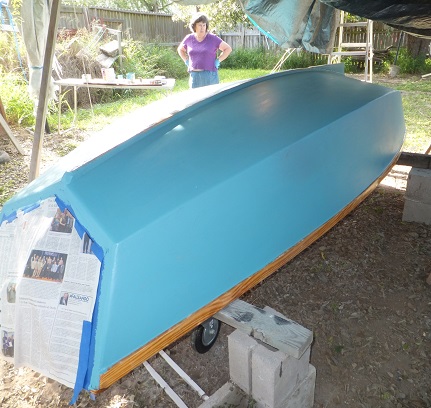
Gave coat of epoxy to entire interior, finally sealing all the plywood on the hull. 17 Nov. 2016
This was done late in the day before a weather event bringing rain and 2 days of cool weather.
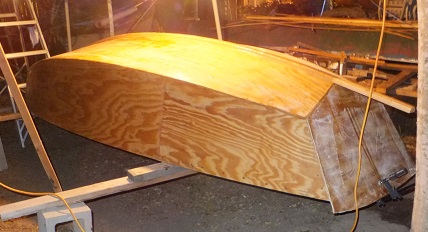
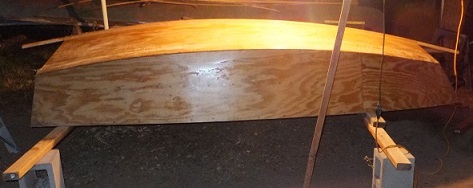
This work essentially finished the build of the hull.
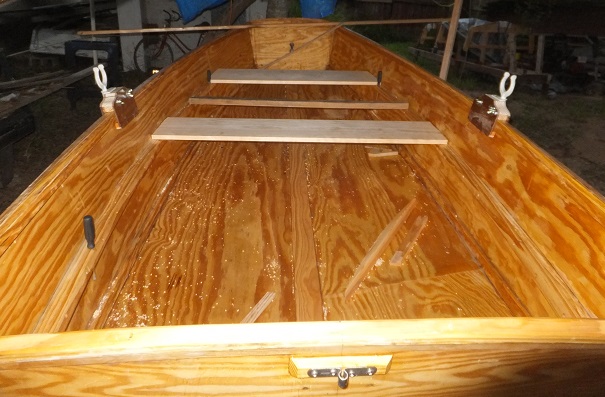
looking forward
Starboard side
looking aft
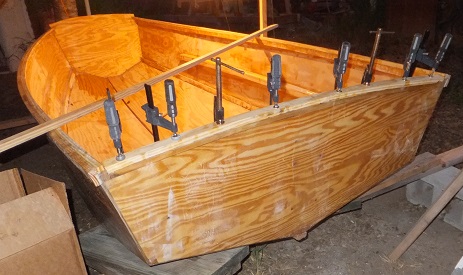
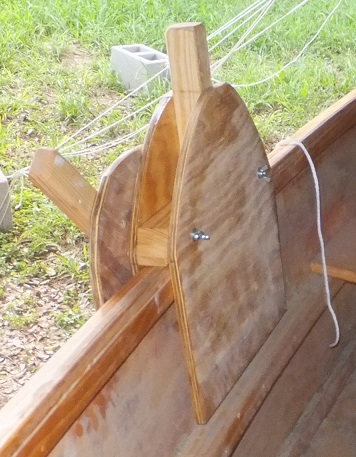
gudgeons for rudder attached to the transom - 6 December
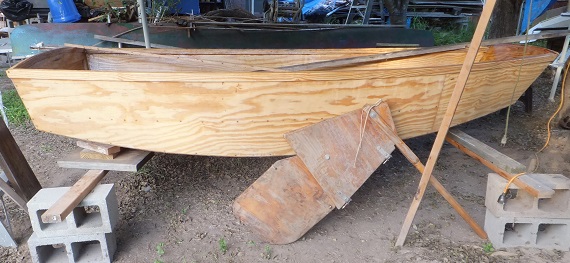
The borrowed rudder (from another boat I have) - Gudgeons were positioned to use this tip-up rudder.
~ ~ ~ ~ ~ ~ ~ ~ ~ ~ ~ ~ ~ ~ ~
13-14 December - Made movable oarlock risers - concept was to have them temporary until proper positioning was determined.
They turned out looking like they would work so well that they might be permanent.
They can be re-positioned for people with different length arms or sitting on othe thwarts fore or aft.
They are removable so that the Saboteer hull can be slid forward on its gunwales if transported on a car top system,
If removed the oarlock risers would not hang up when sliding.
 -
-  -
- 
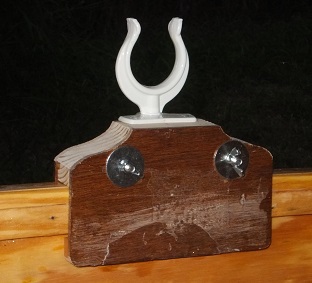
Inside - - - Oarlock riser with rowlock (the thing in which an oarlock fits) and the oarlock and the loom of an oar. - - - Outside
Oarlocks in place - thwarts (seats) fitted - photo 29 December 2016
Note the black screwdriver handle on the left (Port side)
I am using these as belaying pins to keep the thwarts from sliding fore or aft.
Holes are drilled as needed in the thwart riser to accommodate the belaying pins
~ ~ ~ . - - -

Pivoting Leeboard - concept - planned on the model (see web page on model here)
The base clamps on the side and the leeboard blade, which is fastened to the base. The leeboard blade pivots as needed.
The whole system is easily removable from the hull. - model work to figure it out done 20 November 2016.
During a visit near the end of January 2017 I found it very interesting that one of the older historical boats on display
at the Farley Boatworks had a slide-on pivoting leeboard system almost exactly like my concept.
There is nothing new under the sun. - My idea seems not to be a new idea.
~ ~ ~ ~ ~ ~ ~ ~ ~ ~ ~ ~ ~ ~ ~
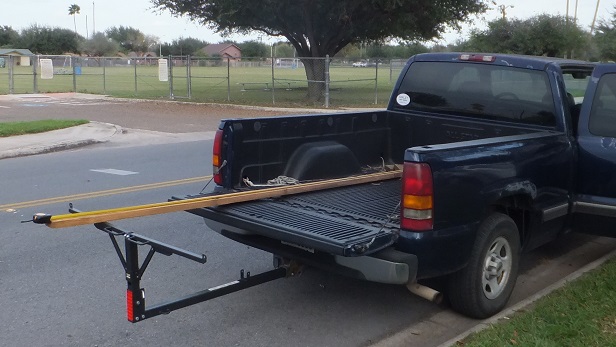
The tailgate extender which may support the hull in the back of the truck.
A 12 ft 2x4 in bed and on the tailgate extender demonstrates it is is plenty long enough to handle the hull.
The extender is rated to hold up to 500 pounds, more than enough to accomodate the Saboteer plus hull.
~ ~ ~ ~ ~ ~ ~ ~ ~ ~ ~ ~ ~ ~ ~ ~ ~ ~ ~ ~
Events of the winter 2016-2017 holiday season effectively halted progress on the build.
In late January I managed to damage my left hand/wrist in a fall, which took me out of building anything for a month.
Meanwhile I am still trying to decide on what type(s) of rig I might try and from that
the placement of the mast. It takes considerable searching in local lumberyards to find
decent lumber for a mast. I finally found some 2x6 boards which had some clear patches
in them, running their length, from which I could cut lengths for a laminated mast.
The mast being built is tall (long) enough for any reasonable rig.
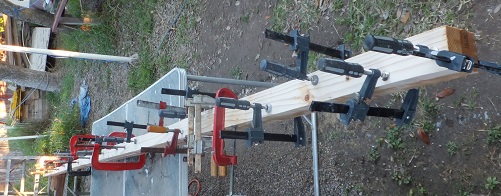
Epoxy-ing together 2 slabs cut from clear parts of two 2x6s 16 ft long to make a mast. 20 Feb 2017
After the glue-up there was considerable cutting off and power planing to end with a mast blank
that is 2.5 inches square at the bottom and 1.25 inches at the top. Router work rounded off the edges.
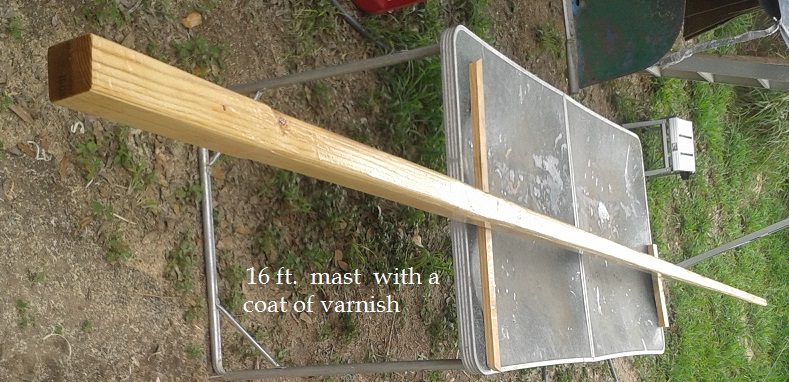
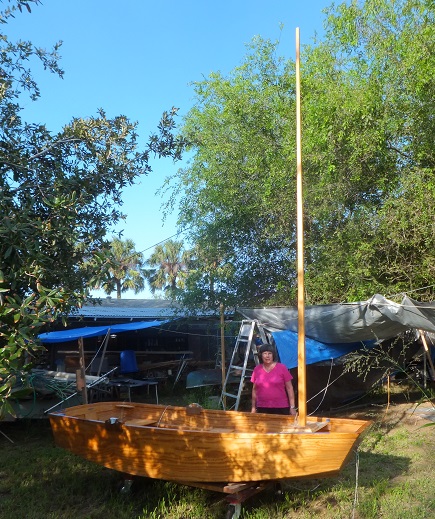
The 16 foot long mast - with a coat of varnish - 7 March 2017
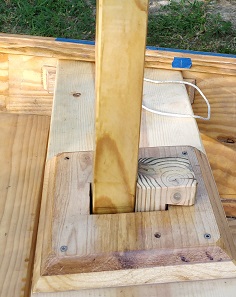
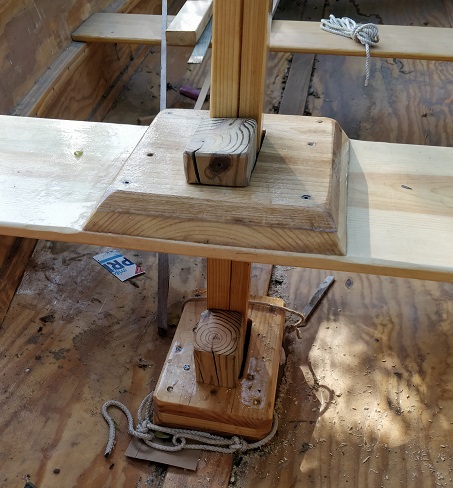
- - installed mast step - - installed mast partner - -
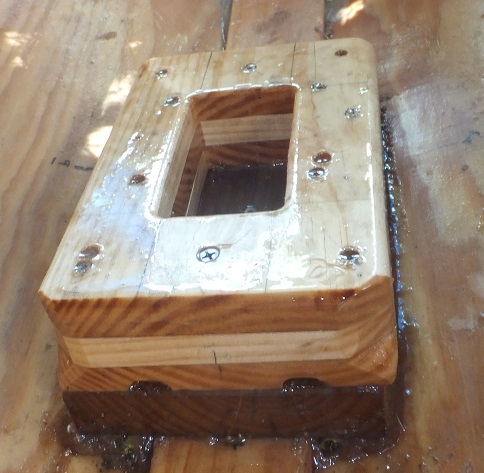
The mast step is a comparatively massive structure.
There are 2 channels cut in to allow water which may splash in to exit.
It is a rectangle so that the mast could be shifted forward or aft and wedged in place
so that different sail rigs can be accommodated.
-
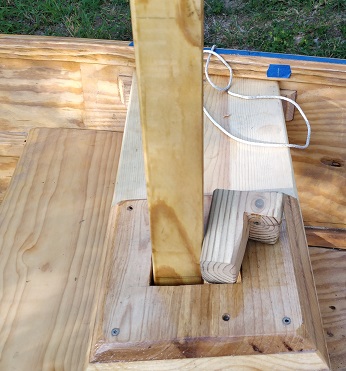
Mast Partner - located - mast hole cut.
First fitting of the taller 16 foot tall mast - set in mast step through the mast partner.
It is in the - forward - position - the step and partner allow some adjustment.
- - -
 - -
- - 
Mast partner wedge in place - - Mast partner wedge - out to show detail
The mast is in the aft position for this fitting.
Mast wedged in aft position both at setp and partner.
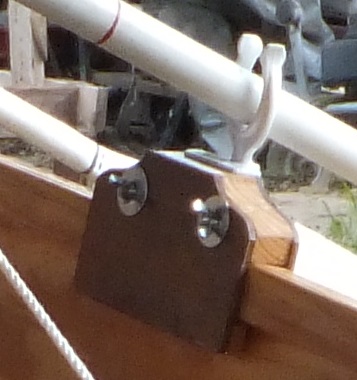
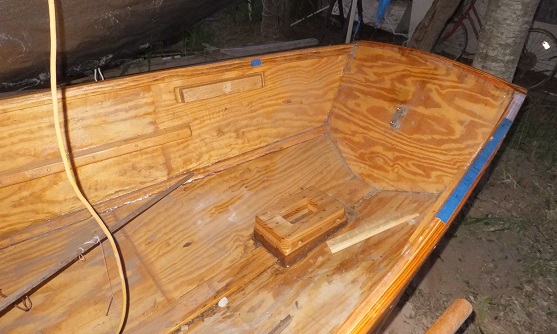
I constructed a pair of corner braces from a bit of 1x oak board and epoxied and screwed them into place.
![]()
They will stiffen up the transom to side and act as the points of attachment for a rope traveler
for the sail mainsheet.
4 November 2017
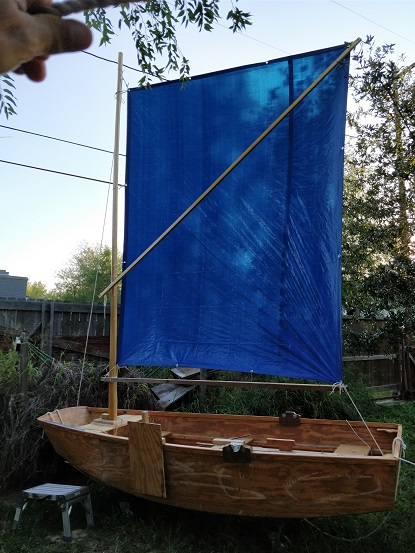
Blue tarp filling in as a sprit sail. It is set on the shorter 14ft mast.
The point of this exercise to have a look at set of rig if a spritsail rig is used.
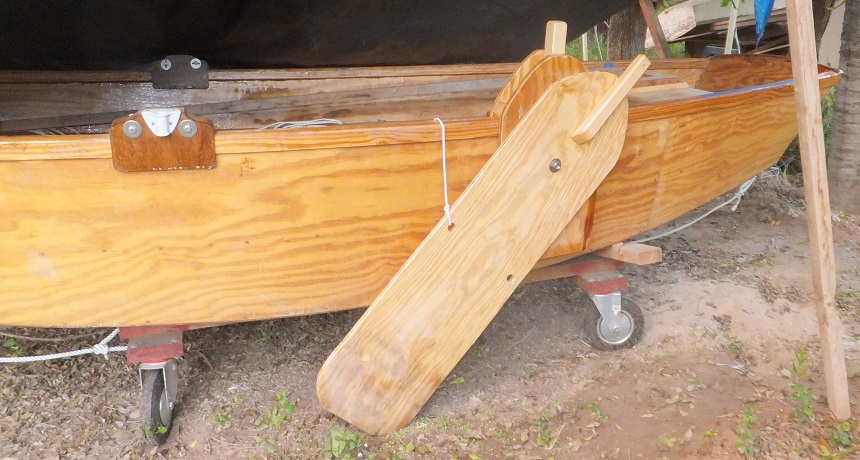
The finished swiveling leeboard sitting on the starboard side of the Saboteer.
15 November 2017
The part of the leeboard on the inside of the dingy.
Skeg mounted on to keel aft. This was carved out of a piece of 2x6, fitted then epoxied
and screwed and lag screwed from the inside through the keelson and keel. - 30 November 2017
Coat of latex paint to protect epoxy on bottom from the sun. - 2 December 2017
A few days later the transoms got 2 coats of UV protectant varnish.
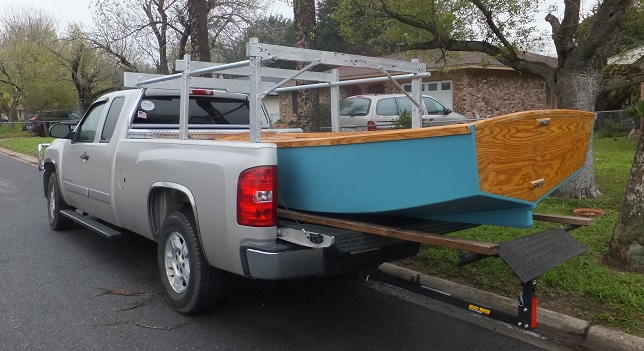
The first fitting of the stretched Saboteer in the back of the truck. New Years Eve 2017.
Note the tailgate extender, with the black door mat on the top cross bar to keep it from scratching the bottom of the dingy.
Yes, it was cold and beginning to misting drizzle.
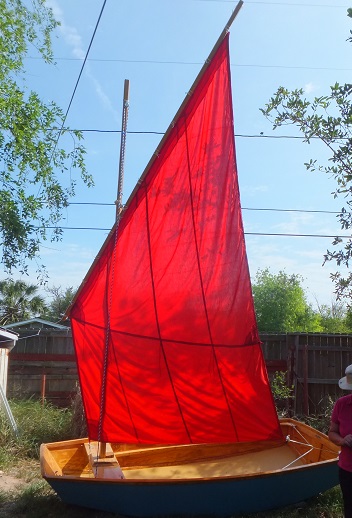
Sail fitting
We used some plain poly/cotton to make a red sail.
As the cloth was light weight we sewed a false seam down the middle of the cloth to add strength.
This was a technique used by sailmakers back when sails were made of cotton or flax.
This fabric will stretch some in use. Hopefully some of the wrinkles will stretch out.
Instead of using a more conventional bolt rope I used some lightweight webbing on the
Head, Luff, and Foot to reinforce the edges. Webbing was sewn across the sail horizontally
where reef points were to be located.
Instead of putting grommets in the sail to accommodate reef lines (nettles) I pulled the innards out of parachute cord
and sewed the parachute cord nettles on either side of the webbing. We will see if this works out in actual use.
Instead of reinforced grommets in the head, throat, tack and clew
We just doubled some of the webbing, making a loop for those attachment points to attach the sail.
 -
- 
The red lug sail set full up. In this case the taller mast was used. Mast position straight up.
The red lug sail set at its deepest reef.
update - 31 August 2016 - 18 October 2016 - 25 Oct. 2016 - 2 Nov. 2016 - 6 Nov. 2016 - 13 Nov. 2016 - 21 Nov. 2016 -
- 9 March 2017 - 30 July 2017 - 16 October 2017 - 15 Nov. 2017 - 31 December 2017 - 13 Aug. 2018 - 4 September 2019 - 18 Oct. 2024 -
Saboteer MODEL built before the full sized boat
Boat Building Index page